Select Page

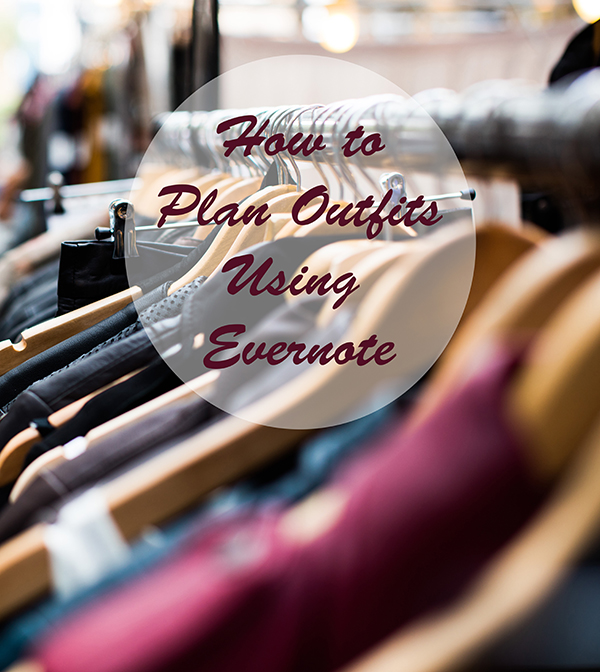
How to Plan Outfits Using Evernote

plan-outfits-using-evernote

Have you ever stood in front of your closet with no idea what to choose to wear that day? Does it seem like you are always scrambling in the morning, trying to come up with a put together outfit but coming up short? Are you crunched for time most days and wish you had a system to help you get dressed quickly each morning?

A while back, I discovered a little trick that has helped me tremendously in planning my outfits and organizing my wardrobe. I made this discovery when I was preparing for a trip, and I have found that it can be extremely useful for everyday wardrobe planning as well.

My helpful little trip utilizes the amazing app known as Evernote.

Have you heard of Evernote? You can read my more complete review of this app here. For now, suffice it to say I really love this app. The possibilities to use Evernote are limitless. It can help you simplify and organize your life in so many ways.

One of the ways Evernote can help get your life organized is outfit planning. Here’s how I use Evernote to plan my outfits.

1. Think about the week ahead.

What activities will you be doing that week? Where will you be going? Are there any special wardrobe items you will need to have ready for a certain day that week? Thinking ahead gives you a chance to evaluate what sort of choices you will need to make when it comes to your clothing for the upcoming days.

2. Choose an outfit for each day of the entire week.

This may seem like a lot of work all at once. After all, the idea is to make this process easier, right? But trust me, this makes it so much simpler to plan your looks for the week. Choosing 5, 6, or 7 outfits at a time doesn’t really take that much longer than choosing 1.

Think about it; you’re already in outfit planning mode. Taking a block of time to pull out, match up, and lay out your choices will save so much time when you are actually getting ready on a given day during the week. You won’t have to stop and think about which top you’ll pair with which bottom and which shoes go with those. All that decision making has already been done.

3. Lay out or try on your outfit choices.

One by one, lay out your choices—on your bed, on the floor, maybe hanging up on a clothes hanger. Lay out or hang them anywhere you can get a good overview of them. You can even try each outfit on. (That’s what I usually do.)

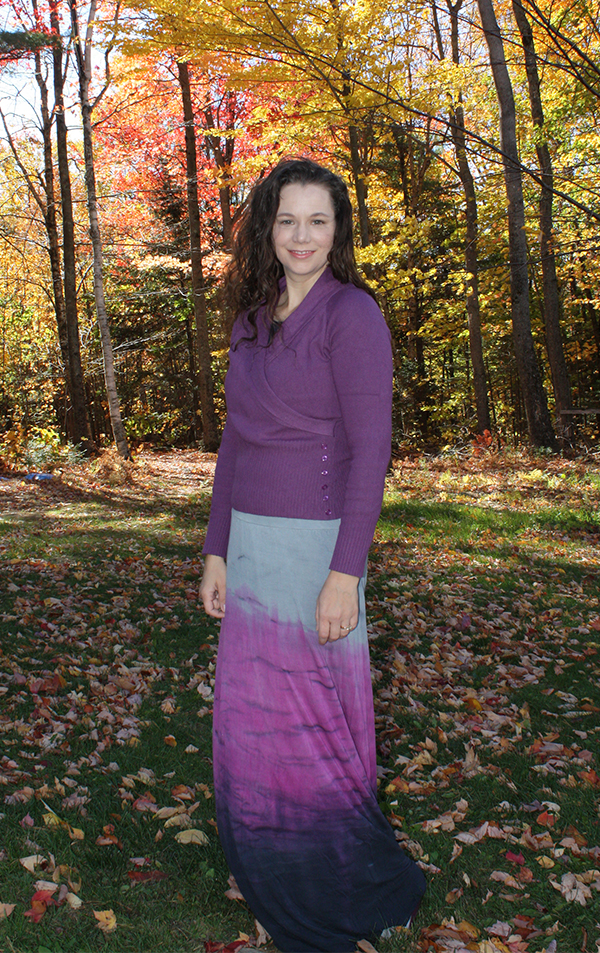
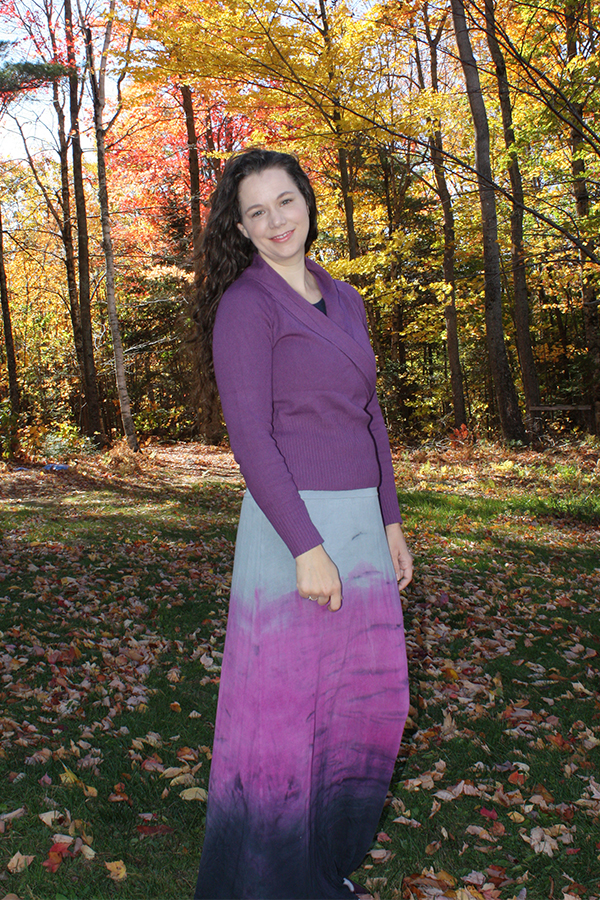
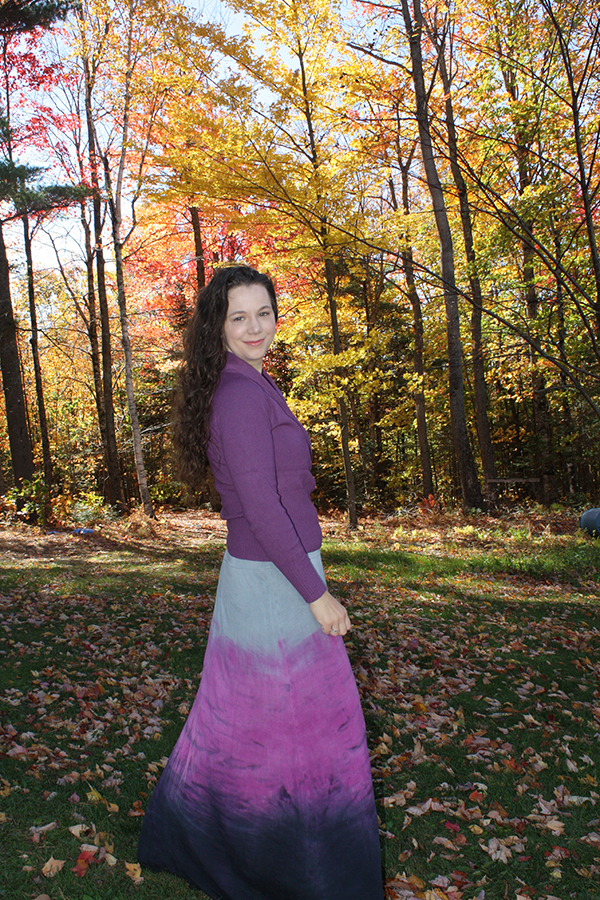
4. Take a good, clear photo of each outfit.

A good photo of your planned outfits is an extremely useful tool. As you’ll see in the next step, it is an essential part of this process. Make sure it’s well lit and you’ve included everything in the photo that you want as part of the outfit. Shoes, belt, jewelry, even handbag. Everything.

5. Add the photos to a note in Evernote

Open up your Evernote app (if you don’t have Evernote yet, you can open a account and download the app for FREE here). Add a new note. Upload the outfit pictures you just took to the new note you just created. Save and file the note in an appropriate notebook within the app.

6. Use the note in Evernote as a guide

Now you have a handy reference for the outfits you have planned out ahead of time. As you get ready in the morning, refer to your note in the Evernote app. All the details are already there; all you have to do is pull out the items that make up the outfit and get dressed!

After a while, you will have a good sized library of outfit ideas to look to for inspiration. Your closet will come alive with possibilities!

This little trick has worked beautifully for me, especially when I am planning for travel. It helps me streamline my packing process and make the job so much easier.

Plus, it can kind of feel like playing dress up in your own closet!

If you try out this idea, and it works for you as well as it has for me, I’d love to know!

If you have an outfit planning system that works great for you, please share in the comments. I always like to hear new ideas!


Please note: This post may contain affiliate links. This means I may earn a commission (at no extra cost to you) if you purchase something using one of my links. This helps cover the expense of running the site while keeping the content 100% free. Note that I only recommend products I believe in. Your support is appreciated!

Simple but Elegant Everyday Updo

elegant-updo

With a baby who loves to grab hair, a simple updo for everyday life is a must. But because I have a busy household with lots to tackle each day, I don’t have a ton of time to devote to fixing my hair. Of course, it’s still important that it look nice.

I’ve come up with several easy to do updos to meet these challenges. Many of these styles utilize a flexi clip from Lilla Rose. I have several flexi clips and use them often. They hold my hair well while still being extremely comfortable.

The style I’ve been fixing my hair in most often lately uses a large flexi clip (they come in several sizes). It looks neat and put together without being severe.

This style is quick and simple and the finished look is elegant and pretty.

elegant-updo2
5 Steps to a Simple but Elegant Updo
Step 1
Gather the front of the hair near the temples and pin back loosely at the crown of the head. (Bangs would make this step unnecessary.)
Step 2
Pull the rest of the hair back into a loose ponytail at the back of the head.
elegant-updo3
Step 3
Twist the hair and fold against the head as if creating a french twist.
Step 4
Secure the hair with a flexi clip by pinning in the middle of the “folded” hair.
Step 5
Arrange the hair neatly and pin any stray hairs into place.

elegant-updo4

And it’s that simple! It takes just a few minutes and stays in place all day.

I’d love to know your favorite everyday way to wear your hair, if you’d care to share in the comments.

Modest Fashion Friday: Olive Green and Plum

olive-green-sweater

As the brightly colored leaves flutter to the ground, I’m pulling out more and more of my sweaters.

An olive green cardigan sweater and plum skirt make the perfect palate for a fall look. This cardigan was a bargain find. It was yet another amazing ThredUp purchase. This one was brand new with the tags still on it! The tie belt on the sweater gives a bit of extra interest. There is a subtle sheen to the fabric that dresses up the simple style of this cardigan. And it goes so perfectly with the beautifully patterned skirt I paired it with here.

I got another bargain on the skirt, which came from a local thrift store. The pattern on the skirt is so detailed. It has a sort of mixture of fleur de lis and paisley. The background is plum with accents of gray and brown and bits of the same olive green that I’ve picked up in the sweater.

I added a brown scarf, which picks up the brown accent in the skirt. It adds a bit of extra interest and coziness to the style.

Last but not least are the shoes. These gals are gorgeous! I picked them up at the New Balance factory outlet near our home. Can you believe New Balance makes shoes this pretty? They are a nice neutral medium brown with a wearable 2″ heel and Mary Jane style straps. Perfection! And they’re so comfortable!

My darling husband joined me for this photo shoot. Isn’t that sweet of him? He’s such a handsome fella; I sure am a blessed lady.

olive-green-sweater

What I Wore

Cardigan Sweater: Banana Republic (via ThredUp)
Skirt: Nine & Company (thrifted)
Tank: Gap
Scarf: Walmart
Shoes: Cobb Hill by New Balance


Please note: This post may contain affiliate links. This means I may earn a commission (at no extra cost to you) if you purchase something using one of my links. This helps cover the expense of running the site while keeping the content 100% free. Note that I only recommend products I believe in. Your support is appreciated!

Naturally Curly Hair Care

curly-hair-care

Like most naturally curly gals, I’ve had a love/hate relationship with my own hair over the course of my life. I’ve had times when I loved it, and plenty of times when I was beyond frustrated with it. I’ve straightened the life out of it, and I’ve had cuts that made it practically impossible to manage. Frizziness has been the bane of my existence.

There have been plenty of times when I have walked out of the hair salon, jumped into my car, and started to cry because I hated how my new cut came out. There have also been plenty of times when I received compliments for my curls, all while thinking, “If you only knew what it was really like to have curly hair….”

I’ve looked on with envy at those girls with the straight, smooth locks. I’ve tried to hide my curls behind severe (and unflattering) updos. For many years, it was a struggle.

How Curly Girl Helped

It wasn’t until I read Curly Girl by Lorraine Massey and learned how to properly care for my hair that I began to truly embrace my curls. In fact, reading that book helped me come to terms with the frustrations I had experienced over my curls. I actually learned to embrace my curls.

My curly hair is now healthy, happy, and proudly on display for the world to see. And when I get a compliment on my hair, I gratefully say, “Thank you!” with complete sincerity, because I love my hair, too!

naturally-curl-hair

Please don’t think I’m bragging about my hair. I struggled for so many years to accept my hair as God made it. Now, I can finally say I am grateful for my hair and glad that God made me the way he did.

curly-hair

One of the most important things I learned from Curly Girl was how to wash and style my hair properly. The major problem I had over the years with my hair (frizziness) was primarily caused by the products I was using and the way I was using them. Now that I have a curly girl friendly hair care routine, my hair is so much happier.

My Basic Hair Care Routine

First, and most importantly, I do not shampoo my hair. (The Curly Girl method may be even more about what you don’t do than what you do.) That’s not to say I don’t wash my hair; I just don’t use shampoo to wash it.

If it has build up of any kind, I will use a tiny bit of baking soda (maybe a teaspoon), mixed into about a cup of warm water. I pour this over my hair, massage in, then rinse out thoroughly. I don’t do this every time I clean my hair, however. It can be too drying if used often. It really only use the baking soda every three to four weeks or so.

Any other time I clean my hair, I use a light conditioner that doesn’t contain any silicones, sulfates, or drying alcohols. (I’ve learned to read hair care products ingredients lists very carefully. Lorraine Massey goes into great detail in the Curly Girl book about which ingredients are good, which are bad, and what effect each has on curly hair.) This is called co-washing in the curly girl world. The product I like to use most for this step is Suave Naturals. It’s cheap and smells like coconut, so it makes me happy.

I massage the conditioner into my scalp, then rinse out through the length of my hair. Believe it or not, there is a proper technique to this step, which I learned from the Curly Girl book.

curly-hair-conditioning
Conditioning is Key

After cleansing, I heavily condition my hair with a nice thick, creamy conditioner like Shea Moisture Restorative Conditioner. Moisture is so important for curly hair. Dryness is what causes frizziness. So, if your hair is moisturized, you won’t have to deal with as much frizz.

The Shea Moisture conditioner is nice and moisturizing and it doesn’t have a strong scent, which I like. I use about a tablespoon of this (yes, that much–my hair is quite long), smooth it down the length of my hair, then comb through my hair with a wide toothed comb. Then I rinse thoroughly again.

The next step in my routine is one more conditioner. I use about a quarter sized amount of the Loreal Ever Curl sulfate free hydrating conditioner. I smooth that over my hair and rinse, leaving just a bit of the conditioner still in my hair. This helps lock in the moisture and keep the curls well hydrated.

After washing and conditioning, I towel dry with a microfiber towel. I don’t use terry cloth–it roughs up the fibers of the hair, causing frizz. (Curly haired people tend to be obsessed with frizz, or rather, ways to get rid of it.)

After towel drying, I apply a tiny bit of leave in conditioner to just the ends of my hair. The one I’m currently using is the Shea Moisture Curl & Style Milk. Then, I apply a silicone free gel like Aussie Headstrong Volume Gel.

curly-hair-styling
Styling My Hair

I follow this step with either blow drying my hair with a diffuser attachment, or air drying. I usually air dry my hair because it’s healthier for it, but it takes hours to dry completely. So, if I’m in a hurry to go out somewhere, I blow dry on the low or medium setting, with my head tilted downward and using the diffuser to “scrunch” the hair up toward my scalp. The diffuser is extremely important because without it, the curls will just blow all over the place and look all windblown and messy!

An important thing to note is that I do not comb or brush my hair when it’s dry. Combing or brushing dry hair breaks up the curls and disrupts the natural curl pattern, which leads to–you guessed it–frizz.

And as we all know, we don’t want that.

The Results

I seems like a lot of work, but after all these steps, I know my hair will turn out looking pretty and healthy. I don’t cleanse my hair everyday, either. This style will stay looking good for three to four days or more (with some minor effort at freshening it up) before I need to do the whole process again.

I love the freedom embracing my curls has brought me. I don’t stress or worry over my hair like I used to. Now that I know the steps to take to properly care for my hair, I’m happy with my hair most of the time now.

Even on days with frizz, I know that’s just part of the uniqueness of my hair, and I flow with it (usually). Sometimes it’s okay to be a little untamable.

If you’re a curly girl like me, I highly recommend you read Curly Girl by Lorraine Massey. It could quite possibly change how you feel about your hair!


Please note: This post may contain affiliate links. This means I may earn a commission (at no extra cost to you) if you purchase something using one of my links. This helps cover the expense of running the site while keeping the content 100% free. Note that I only recommend products I believe in. Your support is appreciated!

Modest Fashion Friday: Ombre Maxi Skirt

ombre-maxi-skirt

If you have read any of my other Modest Fashion Friday posts, you may have noticed that I have an affinity for maxi skirts. I love how flowy and feminine they are. And modesty is usually a given in a maxi skirt. The length keeps you covered (and then some). Knit maxis are my favorite because they are so comfortable, it’s like wearing your pajamas all day–while still looking fabulously put together!

Maxi skirts are a trend that is enduring. I think that may be because they are so wearable for just about every woman. The length is flattering. And they come in just about every fabric, color, and style you can imagine.

I think I might own 8 or 9 maxi skirts, most of which are made of knit. I may or may not be slightly addicted. {ahem}

Another trend that seems to be hanging around is ombre. It adds such interest to a garment. No longer relegated merely to the boho style, ombre is becoming a classic.

ombre-maxi-skirt

This knit maxi has a beautiful deep raspberry and navy ombre effect. It’s just so lovely, I can’t stop wearing it. I love the look of it with this surplice style sweater and navy halftee. It’s such a pretty, feminine combination. The sweater is soft and comfy. This outfit is the epitome of stylish comfort.

ombre-maxi-skirt
What I Wore:

Maxi skirt: Dressing Your Truth (I found one similar here)
Sweater: Ann Taylor LOFT via ThredUp
Halftee: Halftee via Deborah and Co.


Please note: This post may contain affiliate links. This means I may earn a commission (at no extra cost to you) if you purchase something using one of my links. This helps cover the expense of running the site while keeping the content 100% free. Note that I only recommend products I believe in. Your support is appreciated!

Pin It on Pinterest